How to use XG Blur: a complete step-by-step guide
Everything you need to know to make the most of the app: registration, photos, image rights, centre management and much more.
🆕 Recent updates
We've added features that make managing privacy and photos even easier.
📸 Custom profile photo
From your profile you can change the photo that represents you. Tap the pencil and upload a JPG, PNG or WEBP image. If you have none, we use the one from your face registration.
🚪 Leave a centre
If you no longer want to belong to a centre (school, club, academy...), you can leave from your profile, with confirmation. The centre will have to add you again if you want to return.
🚀 Automatic or manual sharing
Centres can now decide whether photos are shared automatically when taken (email notice to recognized members) or whether to review them one by one before activating sharing from the gallery.
🎯 Step-by-step face capture
Face registration now works step by step: a central green dot guides you to look straight ahead and a translucent green arrow shows the other directions. Press CAPTURE at each position when ready.
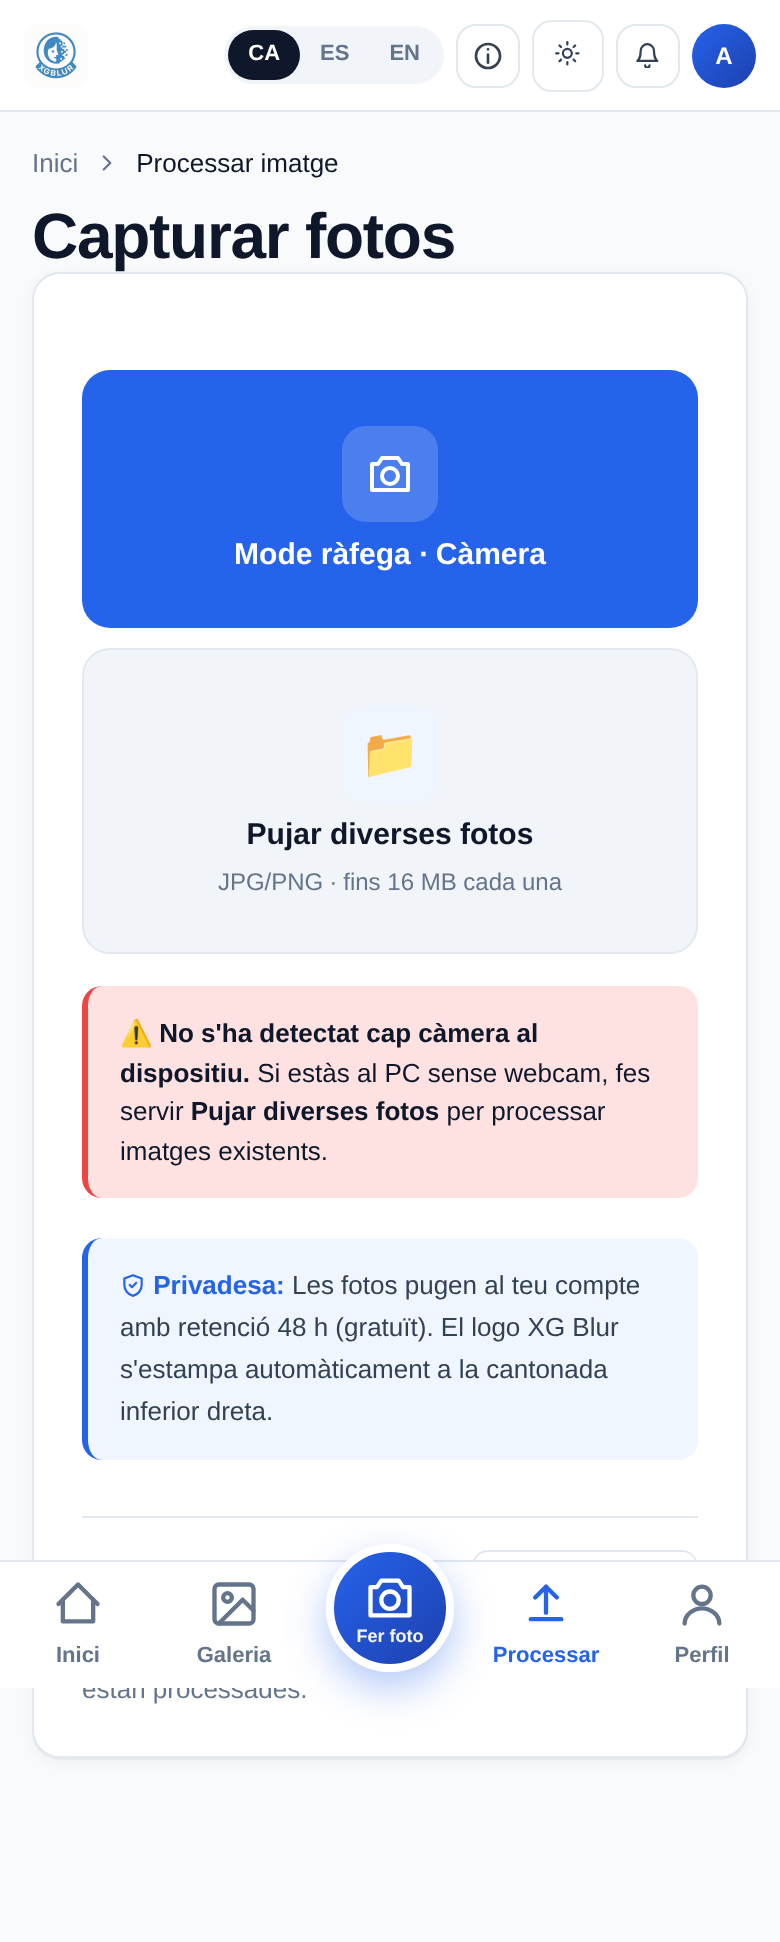
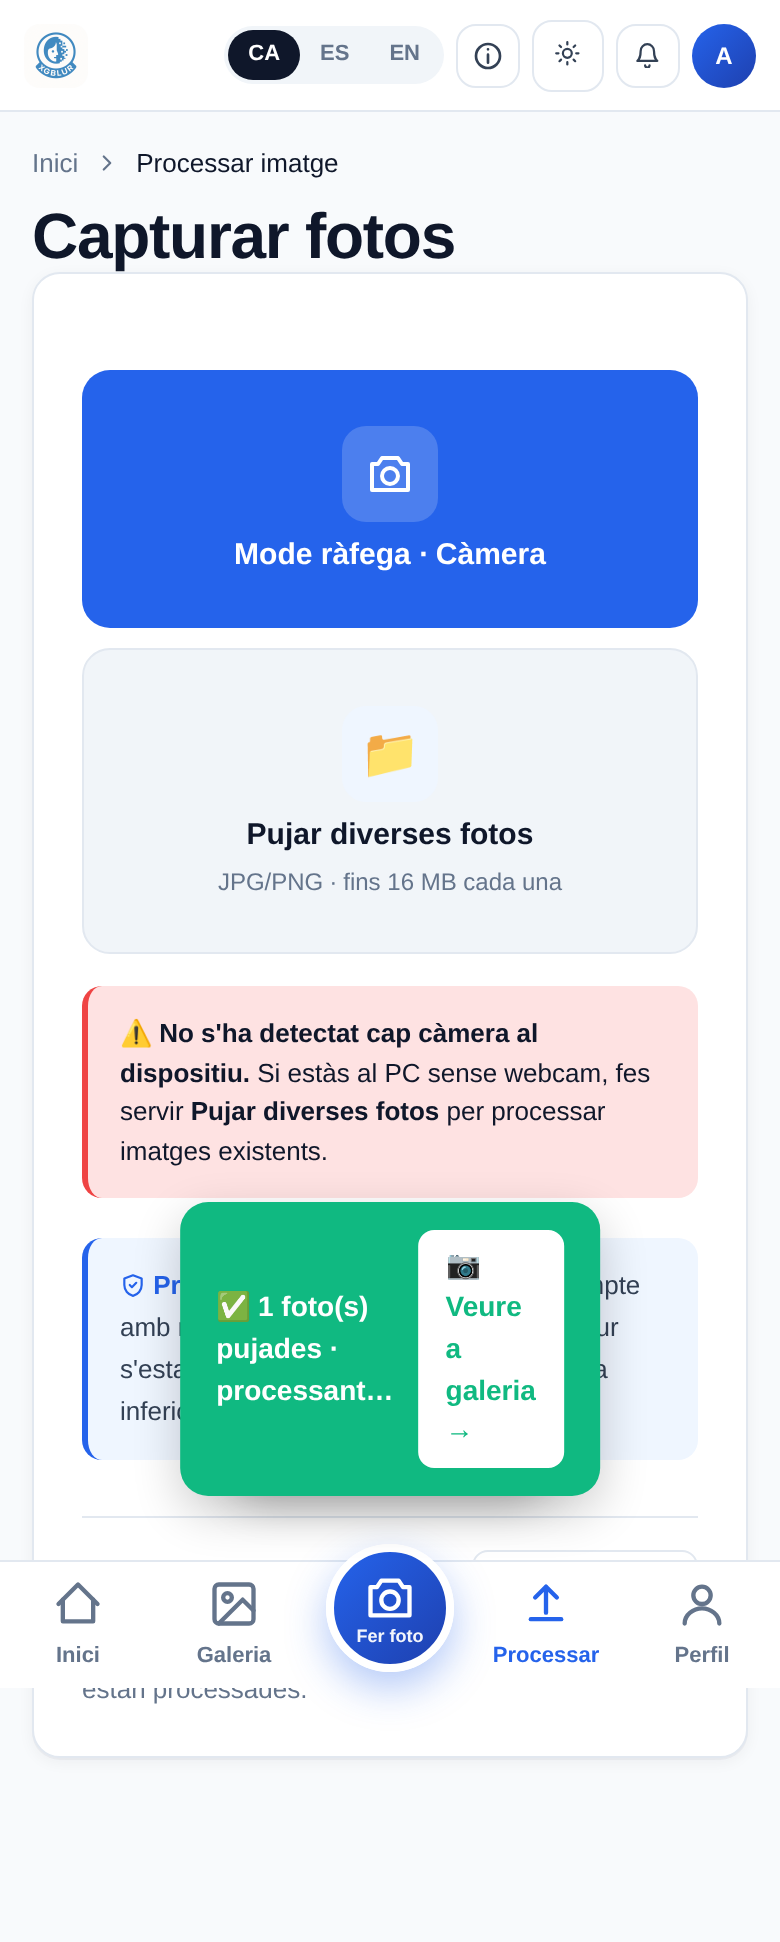
📷 Quick camera button on mobile
There's a large central button on the mobile bottom bar to open the camera directly and take a photo without entering any menu. Captures location automatically if you allow it.
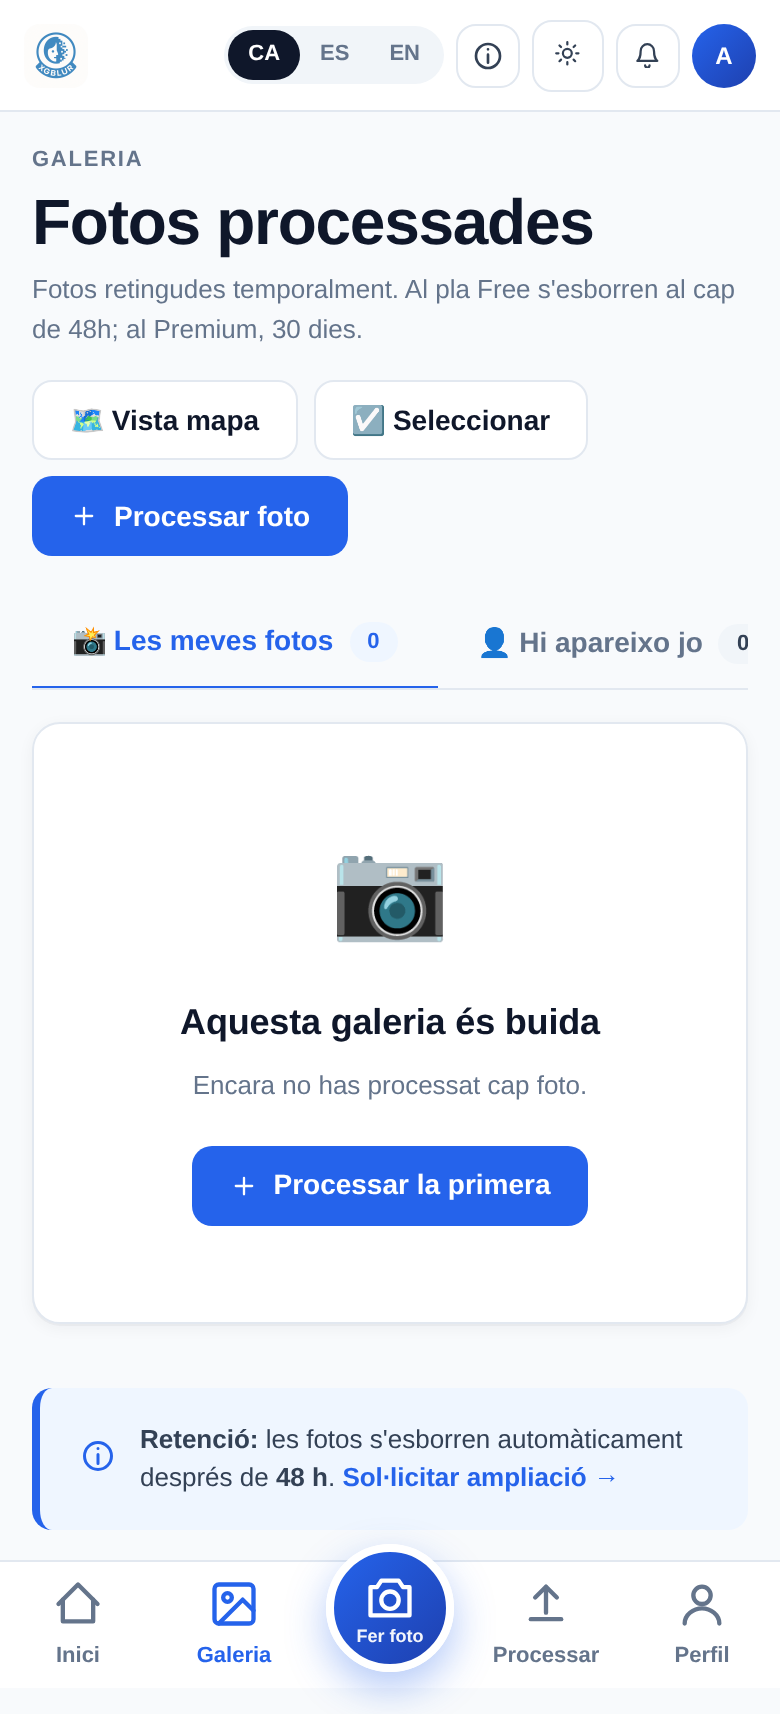
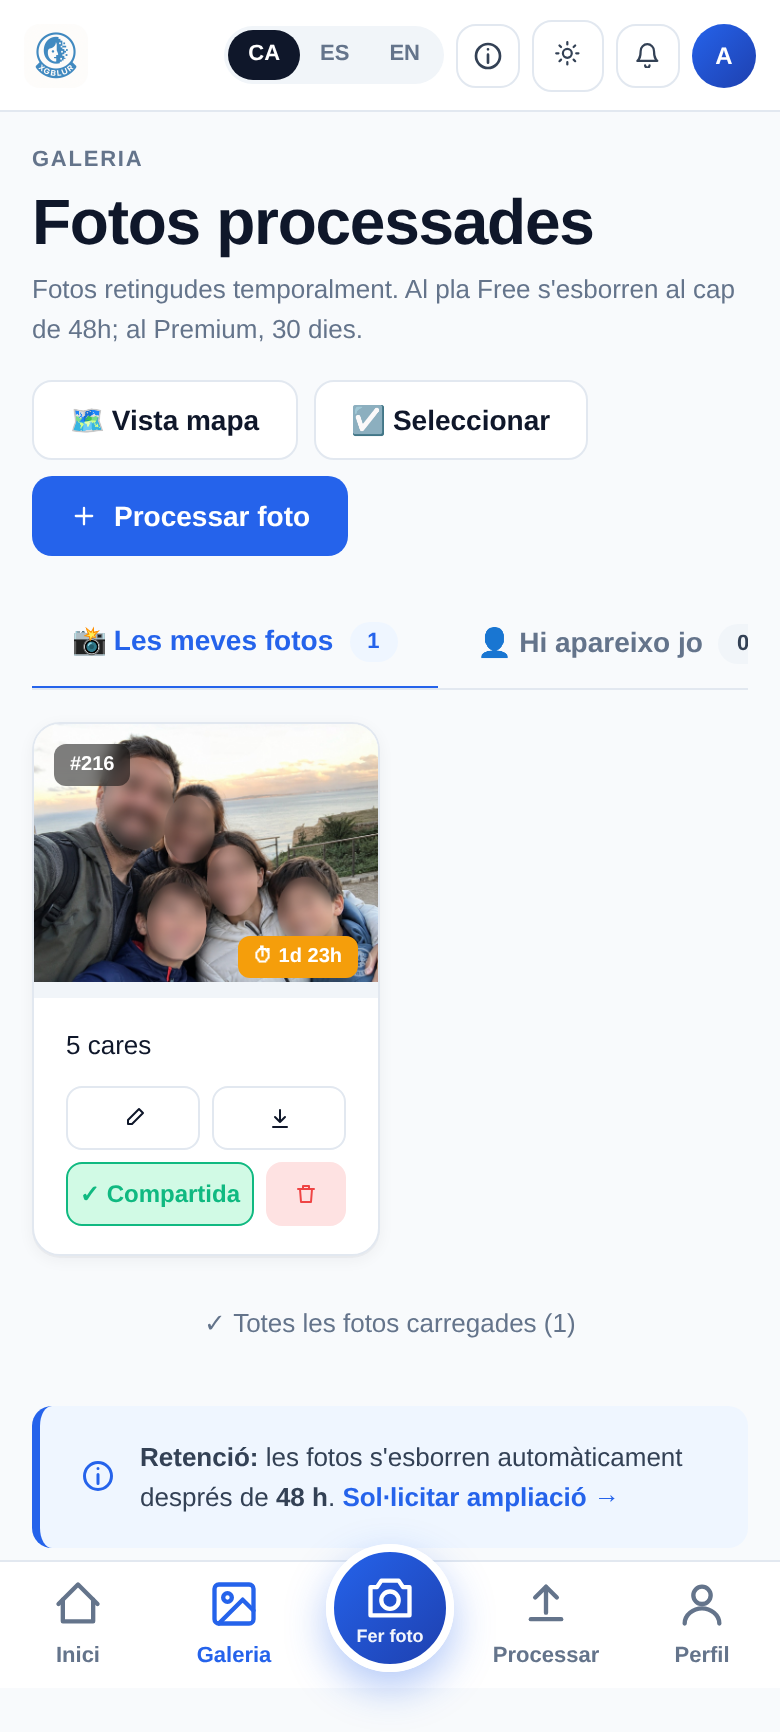
🗺️ Photo map
In the gallery you can see all geolocated photos on an interactive map. Useful to know which outing each photo was from.
🔐 Two-factor on login
When you log in we send you a 6-digit PIN by email that you must enter to finish signing in. Even if someone got your password, they could not enter without access to your inbox.
📝 Free-text photo description
Centres can add free-text descriptions to each photo ("Mountain trip, March 15") so families know what each image shows.
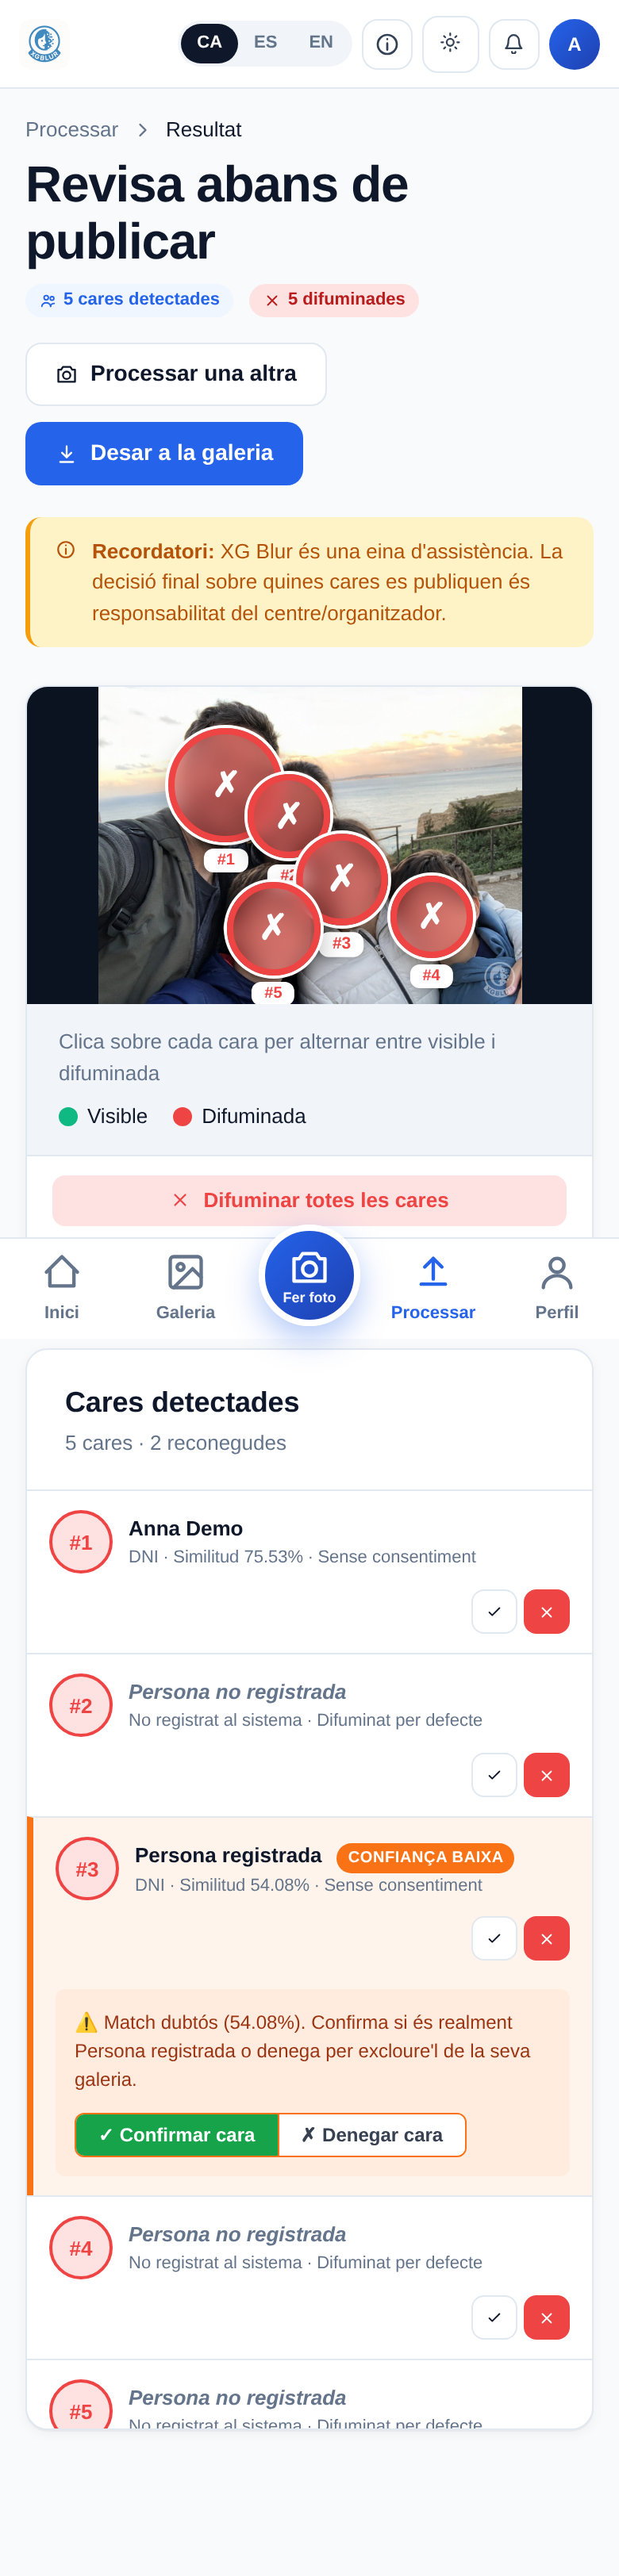
🙈 Blur or show all faces
On a photo result you get two buttons to blur all or show all faces with one click, plus per-face control.
🔒 Names are only visible to centres
To protect privacy, only centres see the names of their enrolled members. Anyone else processing a photo just sees a red circle over faces (blurred by default), with no names.
🛑 Withdraw all processing and data
From your profile you can deny all image processing at once. If you do, we ask whether to delete all your biometric data; and you can always return to your profile to redo the capture and re-register whenever you want.
📅 Events in the gallery
Centres can group photos into events (trips, parties, open days…) to keep the gallery organised and help families easily find each activity's images.
📑 Export justificants (PDF, CSV and Excel)
Centres can download justificant responses as PDF (signed document with legal evidence), CSV and Excel to archive or process them.
How it looks on mobile
XG Blur adapts automatically to the mobile screen. Here are a few screenshots so you can see what it looks like before trying it. You can scroll inside each screen.
What you'll see once inside the app


Flow: upload a photo and see the result
Here you'll see how XG Blur behaves when you upload a group photo. The test user has their face registered. The system detects all faces, recognises the registered person (who has granted rights) and blurs those who haven't given consent.
Screenshots taken with a test user. Data is fictional.
↑ You can scroll inside each screen to see all content.
Install XG Blur on your phone
XG Blur works like a regular app: you can add it to your home screen for one-tap access and take photos without opening the browser.
🤖 Android (Chrome)
- Open xgblur.com in Chrome.
- Tap the 📲 Install app button on your profile (or the browser menu, ⋮ → "Install app").
- Confirm. The icon will appear on your home screen like any other app.
🍎 iOS (Safari)
- Open xgblur.com in Safari (does not work with Chrome iOS).
- Tap the Share button (⬆️) on the bottom bar.
- Select "Add to Home Screen" and confirm.
Benefits of having it installed
- One-tap access, like any other app.
- Runs without browser bar (full screen).
- You can take direct photos without opening the browser first.
User guide
If you're part of a school, camp, team or group using XG Blur, here are the steps to sign up and manage your privacy.
1. Create your account
Go to Sign up and fill in your details (name, email, ID). You will receive an email with a code to verify the account.
2. Face capture (5 photos)
The app asks for 5 photos of your face (front, left, right, up, down). These photos generate a local mathematical model; the original images are deleted immediately.
3. Decide your image rights
In your profile, choose whether to grant default consent to appear in photos, or not. You can fine-tune per centre from Image rights → Per-centre management.
4. Link to a centre
If your school or group has a centre code, enter it in your profile. From then on, the organiser can process your photos respecting your image rights decision.
5. Your gallery
Every photo you appear in can be viewed from Gallery. You can download, share or delete it. Photos expire automatically after 7 days.
👨👧 If you have tutees (children, minors)
You can register tutees (under 18) and decide their consent on their behalf. As legal representative, you control image rights until the minor turns 18 (LO 1/1982).
Organiser guide
If you manage a school, camp, team or any group, XG Blur lets you take photos respecting each participant's image rights automatically.
1. Create the centre
On registration, choose the Organiser role. We will generate a unique centre code for you to share with participants. You can add logo, name and other details on the centre profile.
2. Invite members
From Centre members, add the authorised IDs. If they are not yet registered, you can invite them by email. Each participant decides their image rights from their profile.
3. Delegate with assistants (optional)
You can add assistants (other users) so they can process centre photos without owning them. Useful for monitor or teacher teams.
4. Take and process photos
From Process, upload a photo or take a new one. The app detects all faces, identifies those with consent linked to your centre, and automatically blurs the rest.
5. Review and share
You can toggle blur manually per face if you see any doubtful case. The final photo is saved to the gallery with date, time and image-rights report — legal proof for any audit.
Forms and signed authorisations
A tool to replace paper forms: the centre creates a template, sends it in bulk to guardians filtered by student tags, and responses are signed with immutable legal evidence (timestamp + IP + hash).
🏫 If you manage a centre
- Go to Profile → Forms → + New.
- Set a descriptive title (e.g. 'Field-trip authorisation – Montserrat'). Add text blocks and interactive fields: radio (yes/no), checkbox (multiple options), short or long text, conditional yes/no.
- Insert variables ({{student_name}}, {{guardian_name}}…) by clicking the chips on the sidebar. They'll auto-substitute per recipient.
- Save, preview, and when everything fits click 'Send'. Choose student tags (UNION: the student receives it if they have any of the selected tags). If you pick none, it's sent to all centre members.
- Each guardian gets an email with a link and a push notification (if enabled in their profile). You can view responses in real time, filter by status, send bulk reminders and export CSV.
- You can print each signed form as an official document (click 🖨️ in the table). Responses are immutable at the database level: PostgreSQL triggers reject any UPDATE/DELETE.
👨👧 If you receive forms as a guardian
- When a centre sends you a form, you'll get an email and an in-app notification on the bell icon (and a push if you've enabled it).
- Open the Forms section from your home or top bar. You'll see 3 sections: Pending · Answered · Expired.
- You can filter by ward (if you manage multiple minors) or by centre (if your kids are in different schools). Also by text in the title.
- Open the form. You'll see the text with your child's data already substituted. Fill in the interactive fields and click 'Sign and submit'.
- Once signed, your response is saved with timestamp, IP and hash. It can never be modified again (DB triggers). You can always review your response by re-opening the form.
- If you approach the deadline without signing, you'll get an automatic reminder 3 days before. If you don't respond in time, the status moves to 'expired' and the centre is notified.
Privacy and GDPR
XG Blur is built with privacy at its core. These are the principles we apply:
🔐 Original photos are not stored in the cloud
When you register with 5 photos, we generate a mathematical vector that represents your face and delete the images immediately. The photo cannot be reconstructed from this vector.
⏰ Automatic expiration
Processed photos expire automatically after 7 days. No one can access them afterwards, not even us.
📜 Consent traceability
Every image-rights decision is logged with date and time. You can download a GDPR report at any time as legal proof.
⚖️ Full legal compliance
We comply with GDPR (EU), LOPDGDD (Spain), LO 1/1982 (image rights) and specific regulations for minors.
🚫 We do not sell or share data
No data of yours is used for advertising or shared with third parties. Period.
👁️ Minimal data exposure
Everyone's faces are blurred by default and names are only visible to the centre you belong to. Nobody else can identify you from a processed photo.